For a different type of problem we may encounter while reading a CP, we turn to the Dual-Color Stellated Octahedron by John Szinger. This model is presented on his Zing Origami website and the CP is available there too. A more complete description can be found in his blog.
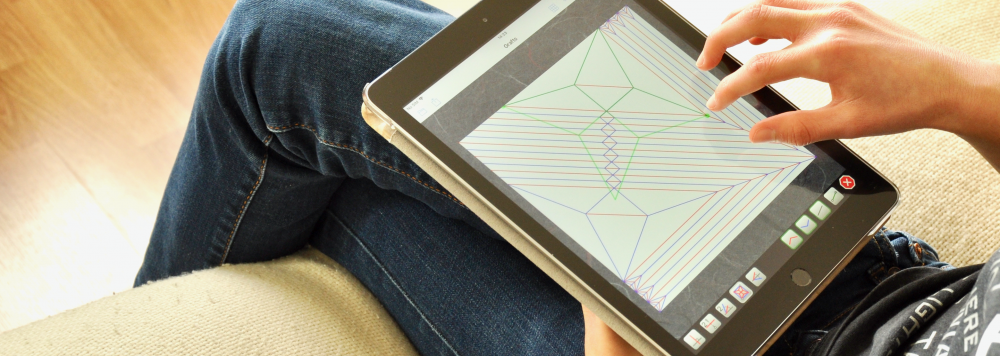
It is a geometrical model resulting from a very technical design process:

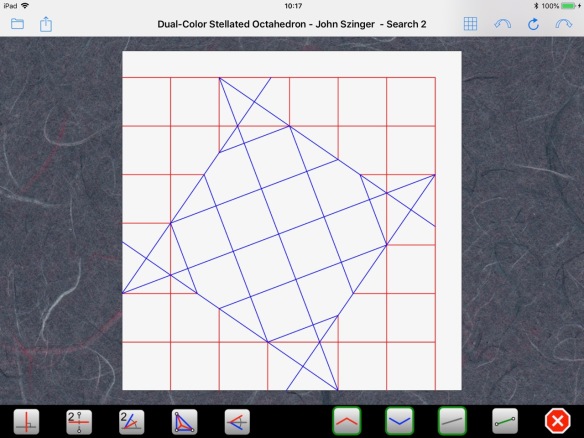
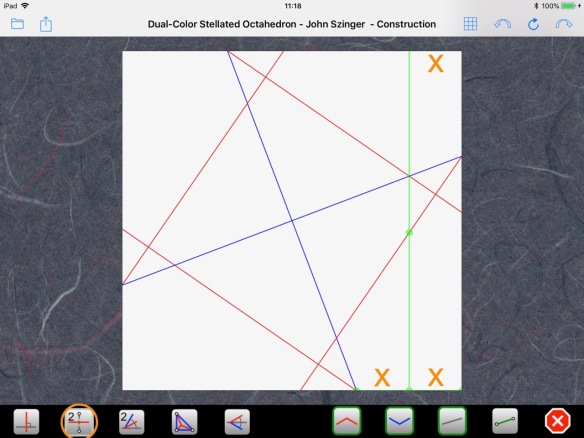
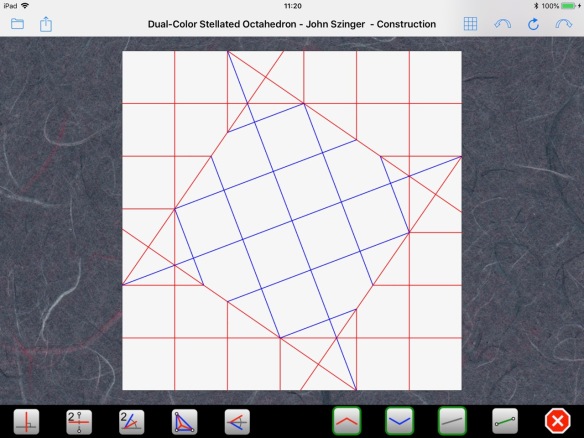
The CP is built on a 13×13 grid:
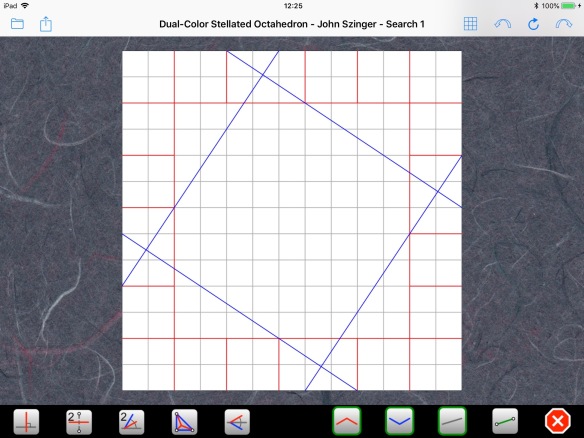
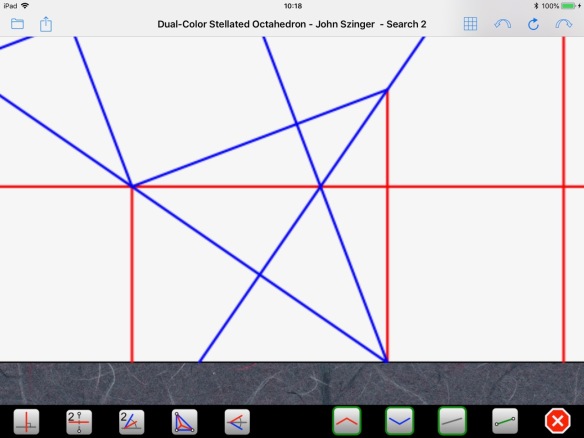
However, looking closer, we can notice slight misalignments that indicate that this is not an exact solution:

We will be able to do better once we fully understand this design. For that, we need to decipher this CP. We will use again our four-step process introduced in the first article of this series.
Step 1: Draw the CP on a reduced portion of the paper
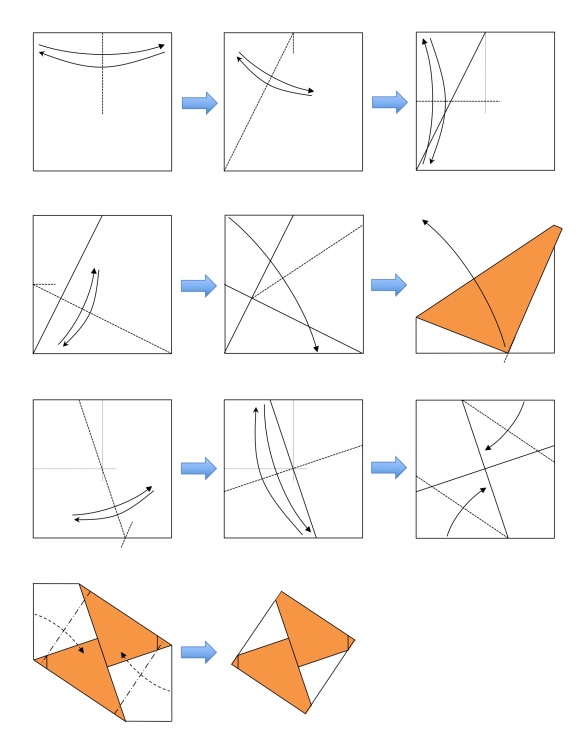
The CP only represents the first step of the folding. It results in a flat square sheet with color-changed regions. Folding this square as a single sheet then leads to the stellated octahedron.
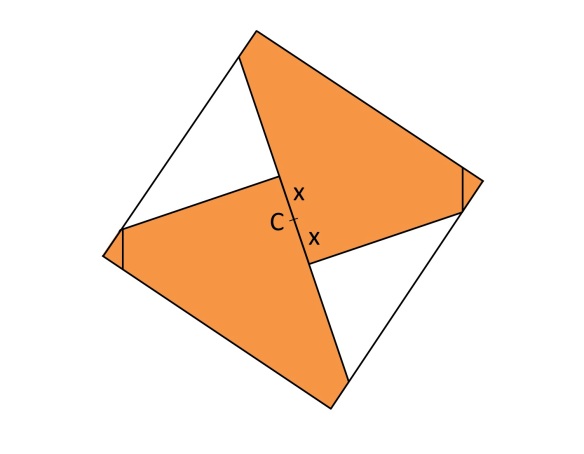
So, we can deduce that when we fold the four corners towards the center of the sheet, the red and blue grids must line up to form a single grid. This leads to the following symmetry requirement:
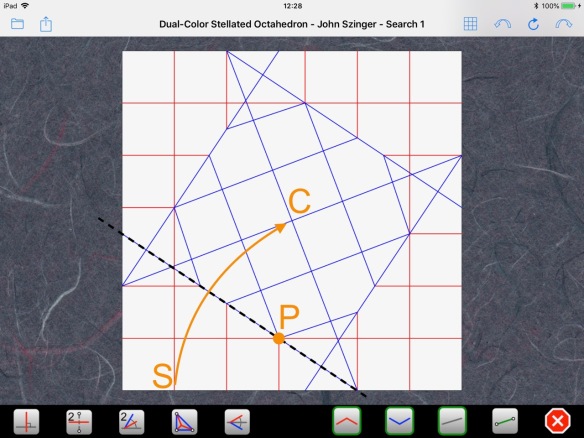
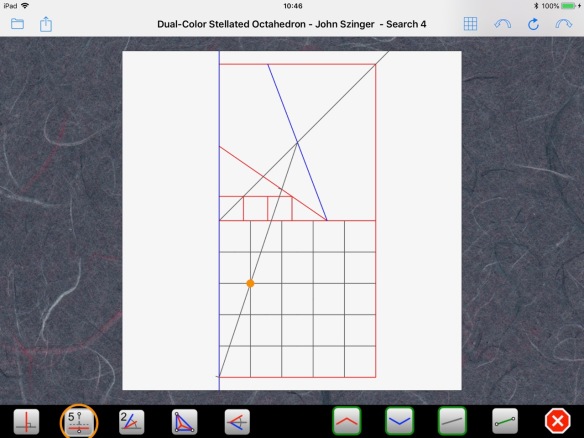
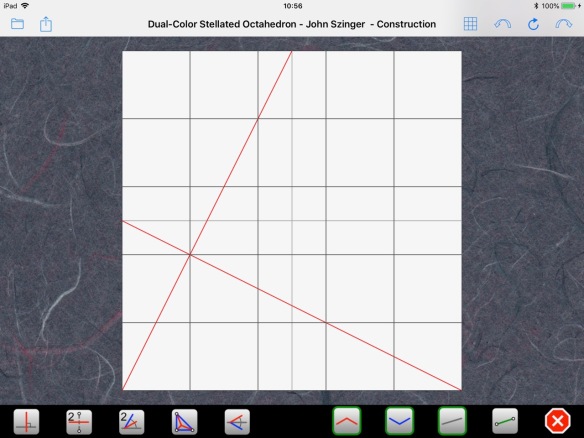
Symmetry also imposes that C is the center of the square. With these pieces of information, we can draw the CP on a reduced portion of the paper, starting from the lower left corner. We use a 7×7 grid:
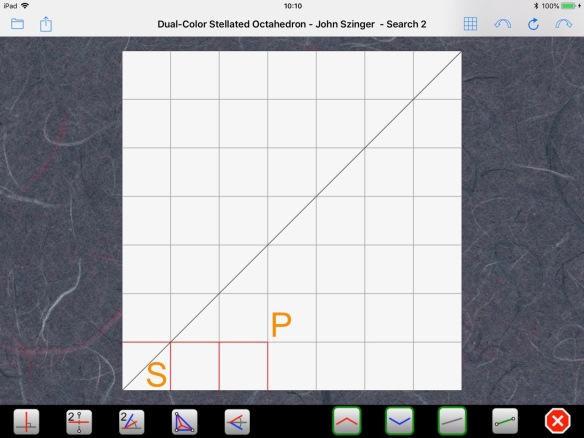
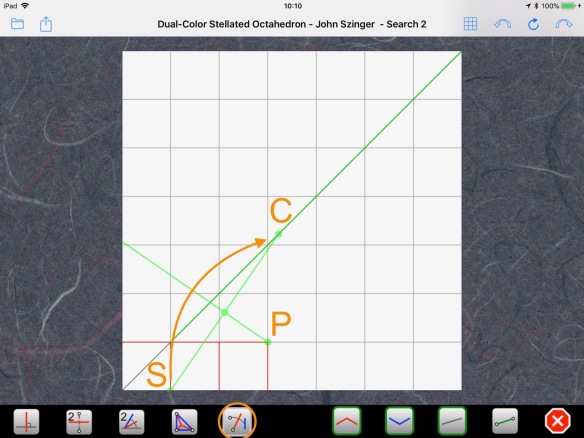
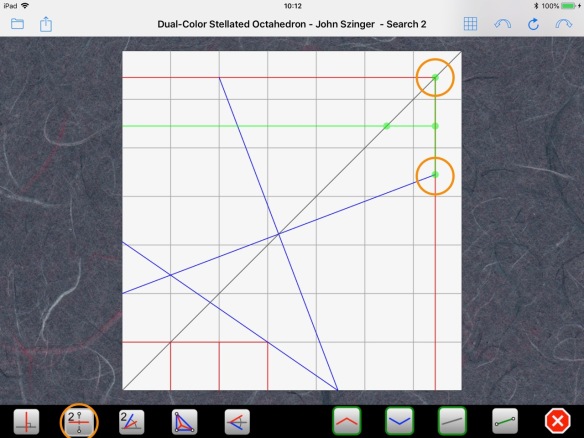
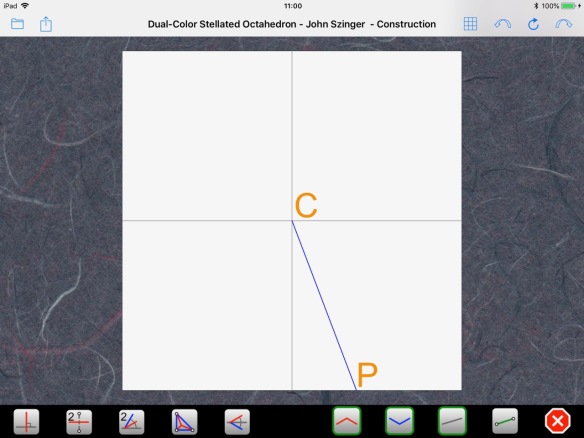
We don’t know where the center C of the reduced paper will be, but we know it will lie on the diagonal. So, we can use Axiom 5 to bring point S onto the diagonal and find C:
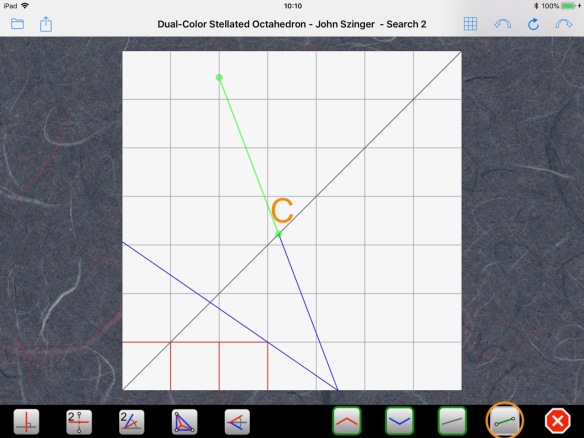
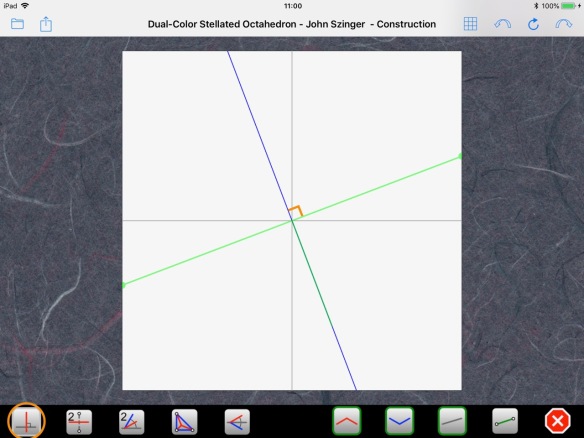
Having the center C, we can now find the edges of the reduced paper:
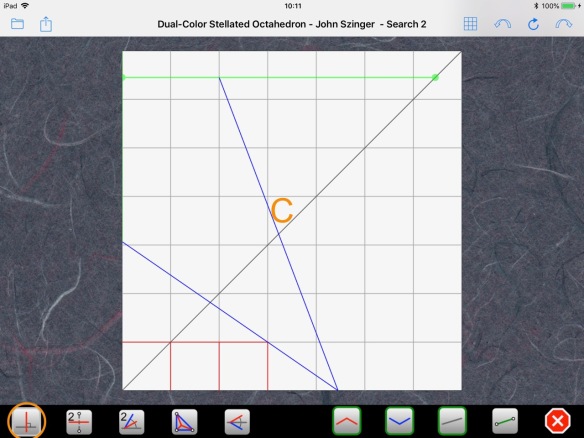
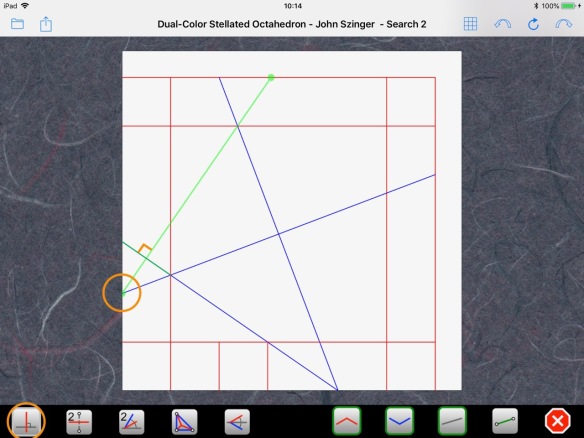
We can also build the perpendicular to our first line at the center of the paper:
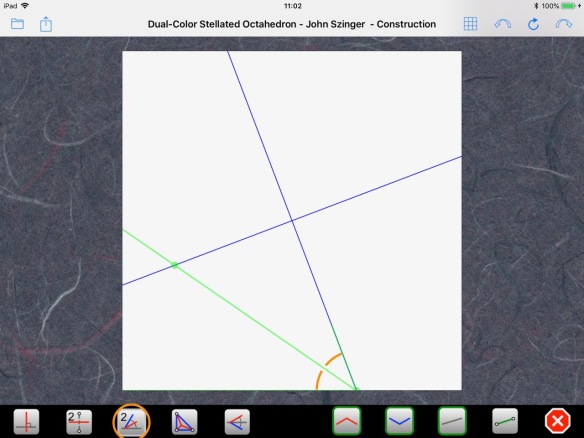
and complete the grid at the far edge of the paper using a bisection:
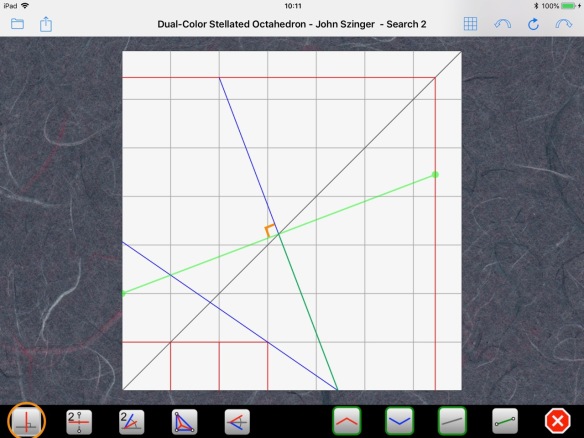
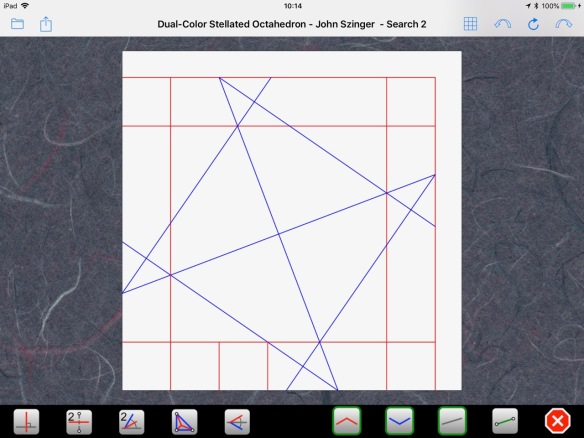
A succession of perpendicular lines:
complete the central square:
We can finish the grid outside:
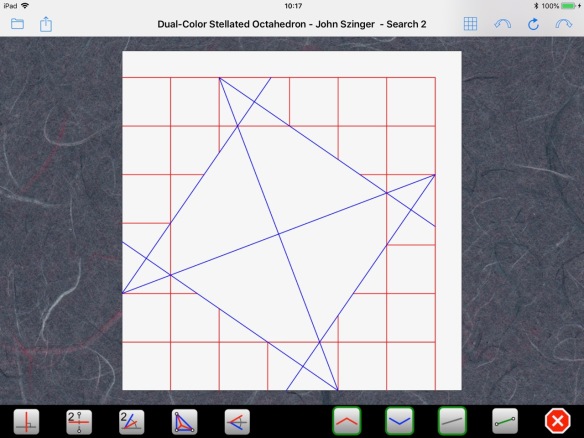
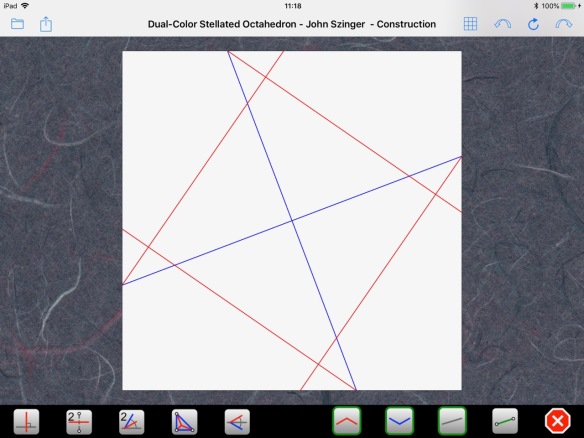
and the one inside:
We can check that this solution is exact:
Step 2: Find references
Now that we have a way to build the CP from the bottom up, we need to search for a top down method. This time around, we cannot escape a little bit of math but we will try to make it as easy as possible.
First, let’s introduce some notation. We will call “x” the size of the small squares and “d” the length of the slanted segment that leads to the center of the paper:
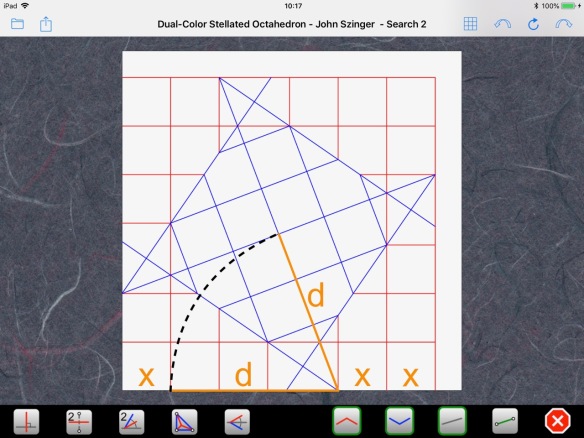
At the bottom of the paper, we could have decomposed “d” into two “x”s and an unknown length, but it is easier to call the whole thing “d”. “x” and “d” will be expressed as fractions of the paper size, which will be one unit. We can thus write:
Paper size of 1 = x + d + x + x
or:
1 = 3x + d
Dividing by 3, we get:
1⁄3 = x + 1⁄3 d
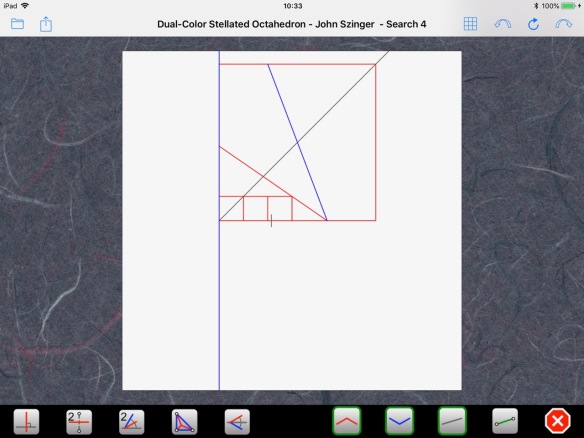
We can reinterpret this relationship by looking at the CP:
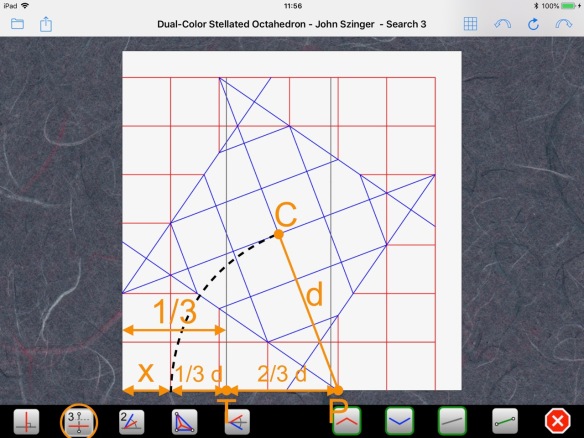
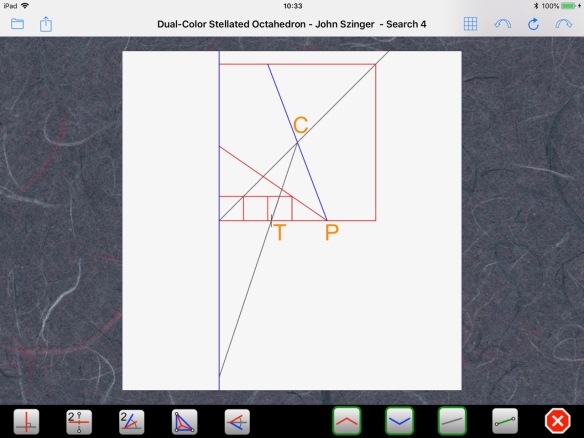
So, we have defined a new point P at distance “d” from C, the center of the paper, and “2/3 d” from a point T, which marks the third of the paper size. Now is the time to get help from some dead people, as Robert Lang puts it, i.e., some ancient mathematicians. In this case, we have to go back two millennia to call on Apollonius of Perga, a Greek geometer and astronomer. He is known for his circle of Apollonius, which is a curious definition of a circle. He says that a circle is the set of points that have a given ratio of distances to two given points. He calls the two points the foci of the circle.
Here we have a point P with distances “d” and “2/3 d” to two points C and T, respectively. The ratio of these distances is 2/3. Apollonius says that if we take all other points with the same ratio of distances to C and T, we should get a circle passing through P.
Unfortunately, most of this circle is situated below our CP. So, to show it in Origami Draw, we have to redraw our CP in yet a smaller region of the paper and leave enough room below. Here, we used a 14×14 grid:
So, where is this circle of Apollonius? First of all, we can observe that, for symmetry reasons, the center of the circle must lie on the same line as the two foci C and T:
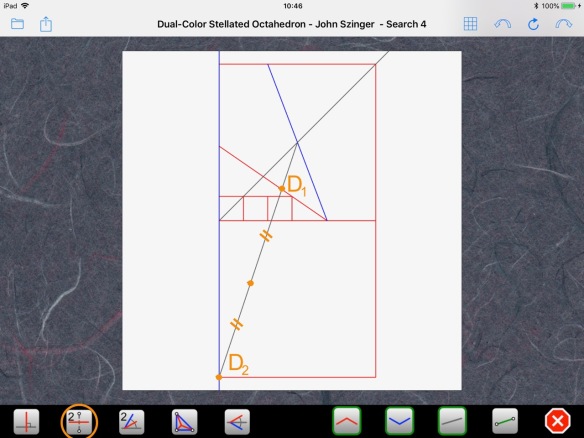
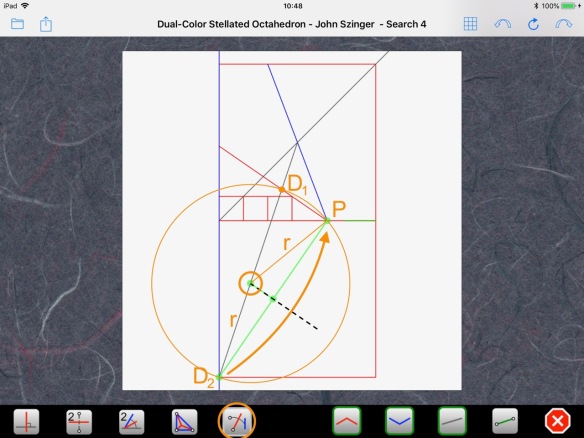
We can then build the diameter of the circle along that line. The points at the end of the diameter can be found by using the ratio of distances to C and T. One point lies between C and T, at 2/5 of the distance:

Point D1 is two tick marks from T and three tick marks from C. Well, surprise! That point lies on the side of our rotated square. The other point is below T, at twice the distance between C and T:
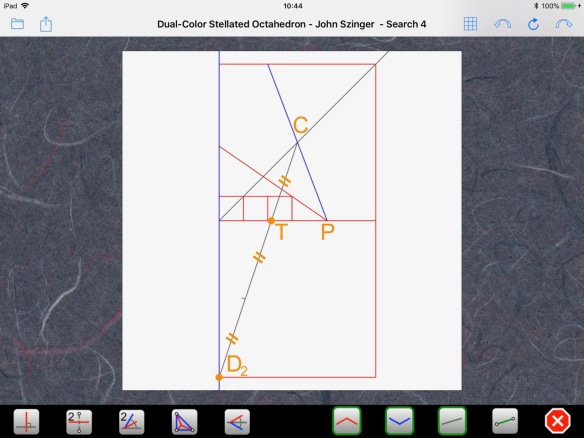
Point D2 is also two tick marks from T and three tick marks from C. Surprise again! That point is the mirror image of the upper left corner of the paper relative to the bottom of the paper. We will be able to use that fact in a moment. Before that, let’s find the center of the circle, which is simply the middle point of the diameter we’ve just found:
If you do the math, you would see that it lies 1/5 of the paper size from the left edge and 2/5 of the paper size below the lower edge. We can verify this by drawing a 5×5 grid using segment N-section:
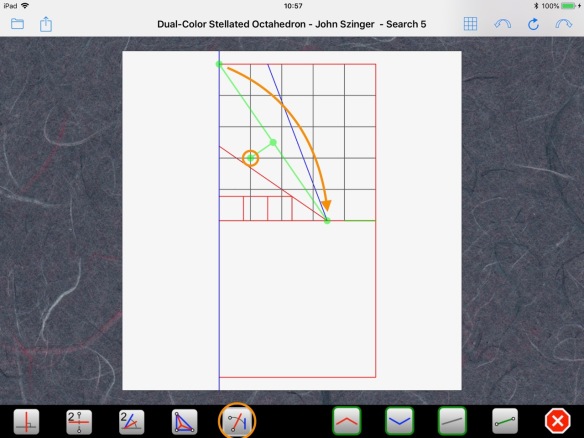
Now, we have a way to find point P: we use Axiom 5 to apply either end of the diameter, for example D2, to the bottom edge of the paper, with the center of the circle as a pivot:
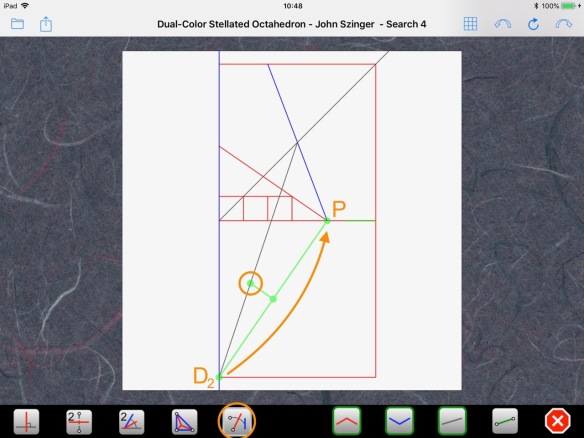
This operation mirrors the radius “r” of the circle of Apollonius, so we know we land on the same circle, i.e., a point that has a ratio of distances to C and T equaling 2/3 and that lies on the bottom edge of the paper. That is point P:
Step 3: Find a folding sequence to build the references found in Step 2
We now have all the elements necessary to draw the CP. However, we cannot perform Axiom 5 on a real piece of paper since we would be outside of it. A simple mirror will solve this problem:
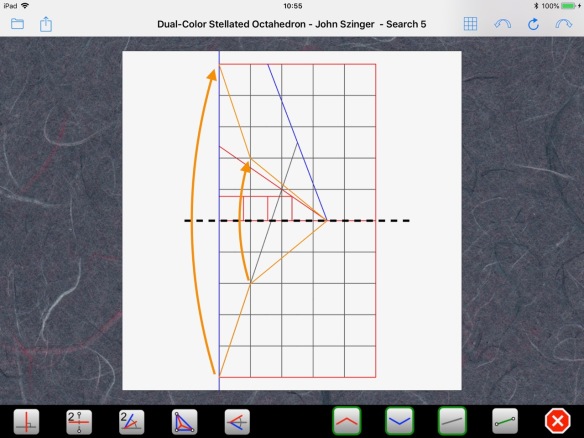
Everything now lies within the bounds of the paper and we can apply Axiom 5 very simply from the upper left corner:
The last issue is the construction of the pivot point. It turns out that the point at (1/5, 2/5) is a very special point in origami. It is the intersection of two lines joining a corner of the paper to the middle of an opposite edge. It couldn’t be any easier:
Step 4: Re-draw the CP using the whole paper area, using the folding sequence found in Step 3
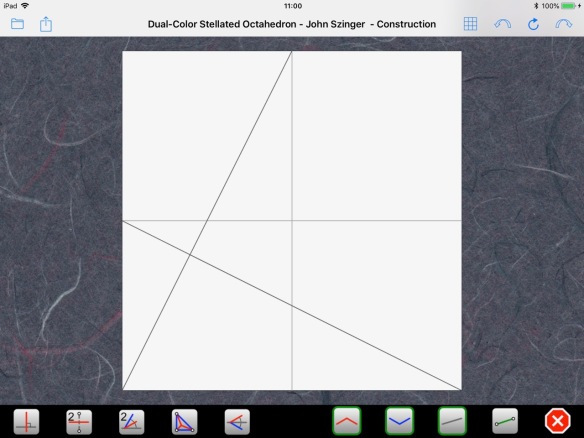
Summing up, we now have a very simple way to build this very technical origami. First, we fold the two medians and we build our pivot point:
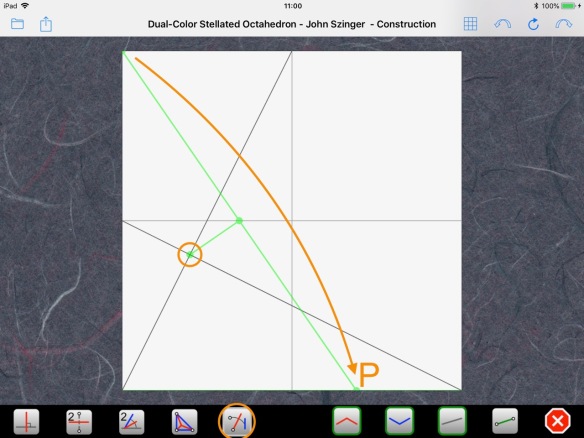
Next, we use Axiom 5 to find point P:
We join P to the center of the paper:
fold a perpendicular:
and then fold the four angle bisectors:
to complete the central square:
All this is equally simple on a real piece of paper:
The shape we obtain is what John Szinger calls an offset blintz. The amount of offset is our grid size “x”:
Back to our CP, we can get this dimension with a segment bisection:
From there, it is easy to finish as in Step 1, completing the outer frame:

the outer grid:

and the inner grid:
Addendum
In reality, this is not the CP we have to fold. It is more a conceptual view showing the way the outside and inside of the smaller square form the same grid, allowing certain squares to be color-inverted. The real CP of the flat base looks like this:

and folds like this in Oripa:
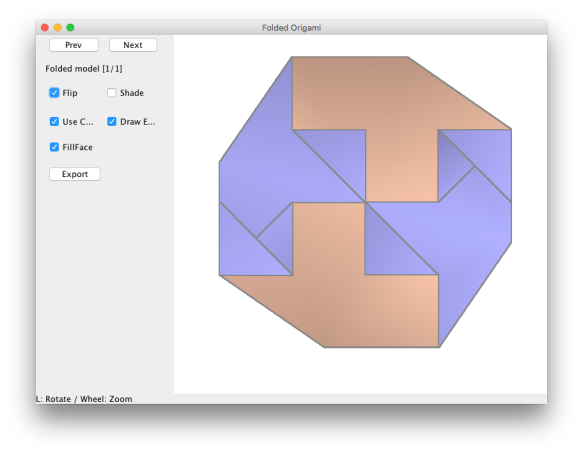
Then we fold according to the grid, add some more folds, shape in 3-D, and lock to get an octahedron. But that’s a whole ‘nuther story…

Pingback: Origami Dual Color Stellated Octahedron Revisited | Zing Blog